
V16 Beacon Placement: Roof Position for Maximum Visibility
Last Updated: November 9, 2026
Quick Summary
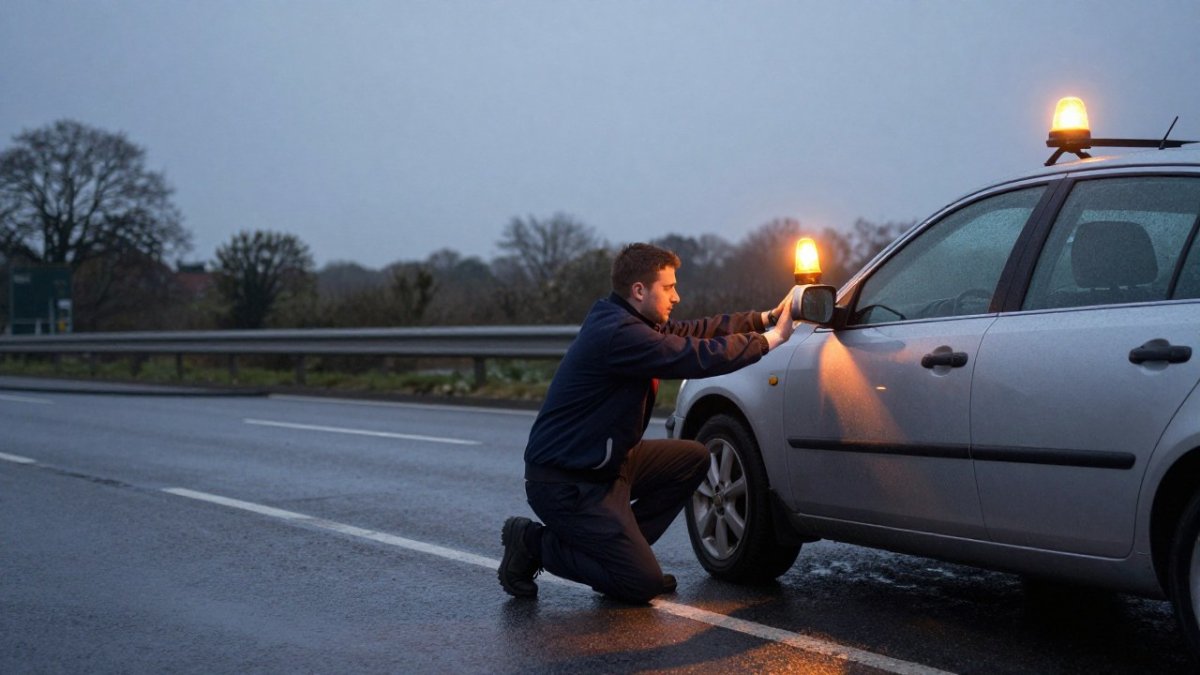
The best v16 beacon placement for visibility is on the flat centre of the roof, roughly midway between the front and rear of the cabin. That is the highest stable metal point on most cars and gives the cleanest 360-degree light spread. Avoid the front roof edge, glass sunroofs, the boot lid and any panel too curved for the magnetic base to sit flat.
- Get every occupant behind the safety barrier before you mount or activate the beacon.
- Press the magnetic base firmly onto the roof, check it sits flat, then activate the light and step back.
- Clean the roof first, because grit under the magnet reduces grip.
- On a panoramic glass roof, mount on the steel frame at the perimeter, usually a strip 30-50 mm wide.
- Test the mounting point in daylight on your driveway before you need it at the roadside.
Table of Contents
- Why Correct V16 Beacon Placement Decides Whether You Are Seen
- How to Use a V16 Emergency Light: Step-by-Step Placement
- The Correct Roof Position: Where the Magnetic Base Should Sit
- DGT 3.0 Compliant Beacon Requirements: What the Spec Actually Covers
- Is a DGT 3.0 Beacon Mandatory in Spain?
- Vehicle-Specific Mounting Challenges: Glass Roofs, Vans and Curved Panels
- Troubleshooting Connectivity and Testing Your Beacon
- Choosing a Beacon That Mounts and Connects Reliably
- Frequently Asked Questions
Why Correct V16 Beacon Placement Decides Whether You Are Seen
A beacon on the dashboard is not doing its job. Correct best v16 beacon placement for visibility means the unit sits on the roof, not behind glass, and that single decision is the difference between a driver seeing you from a distance and a driver seeing you too late.
Here is the core problem. A dashboard light fires through a windscreen at a low angle. A roof-mounted beacon sits above the roofline, in open air, and throws light in every direction.
That is the whole argument.
The Visibility Gap Between a Roof Beacon and a Dashboard Light
- Height: the light clears other vehicles and roadside barriers
- 360-degree visibility: the flashing light is seen from every angle, not just the front
- Distance: an elevated light source is picked out earlier by approaching drivers
Keep reading, because the steps below show exactly where to mount it, how to activate it, and what to do when the beacon will not connect.
How to Use a V16 Emergency Light: Step-by-Step Placement
Using a V16 emergency light comes down to a fixed order of actions: protect people first, then mount and activate the beacon, then move to safety. Doing it in the wrong order puts you in the carriageway longer than necessary.
Step 1: Get Everyone Behind the Barrier First
People before property. Get every occupant out of the vehicle on the side away from traffic and behind the safety barrier before you touch the beacon.
- Switch on your hazard lights
- Put on a high-visibility vest if you carry one
- Exit on the passenger side, away from moving traffic
- Move everyone well back from the carriageway
The full breakdown safety sequence is covered in our guide on what to do when your car breaks down, and it is worth reading before you ever need it.
Step 2: Mount, Activate, Then Step Back
Place the beacon on the roof, switch it on, and return to safety immediately. Do not stand behind the car watching it flash.
- Press the magnetic base firmly onto the roof
- Check it sits flat and does not rock
- Activate the flashing light
- Confirm it is lit, then step back behind the barrier
The whole sequence should take seconds, not minutes.
The Correct Roof Position: Where the Magnetic Base Should Sit
The magnetic base should sit on the flat centre of the roof, roughly midway between the front and rear of the cabin. That is the highest stable metal point on most cars and gives the cleanest 360-degree spread.
Avoid these spots:
- The very front edge of the roof, where wind and vibration loosen the magnet
- Directly above a sunroof, which is glass, not steel
- The boot lid, which sits lower and often slopes
- Anywhere curved enough that the base lifts at one edge
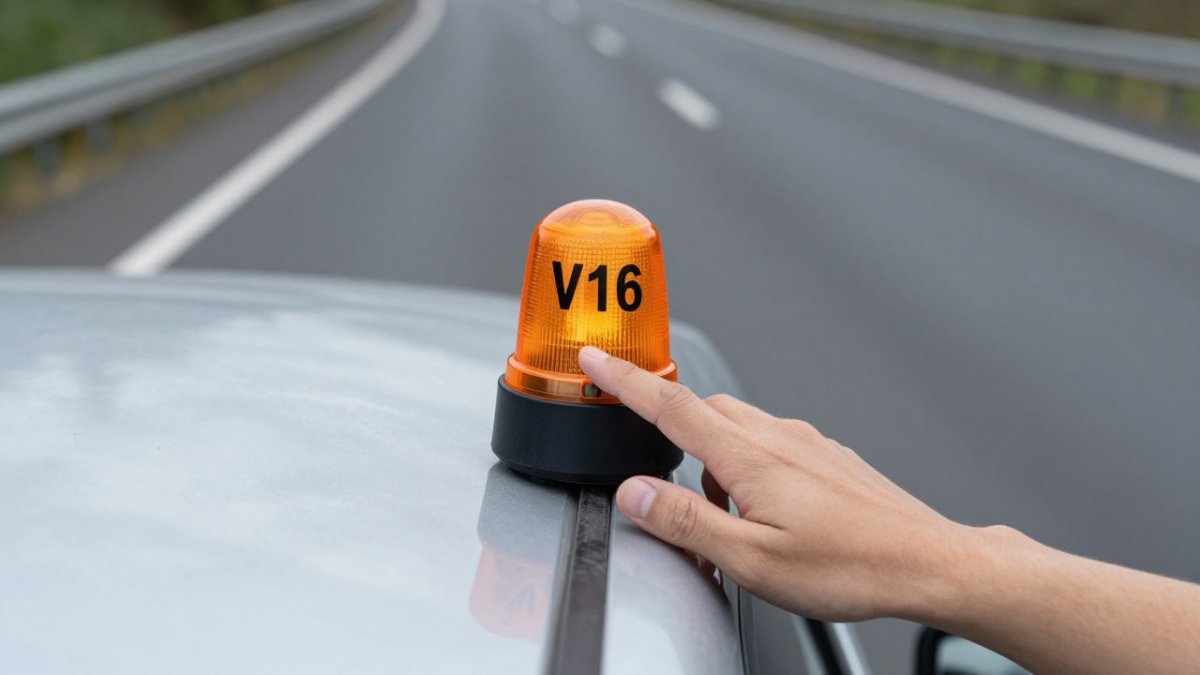
Clean the roof first. Grit under the magnet reduces grip. A quick wipe with a sleeve is enough.
DGT 3.0 Compliant Beacon Requirements: What the Spec Actually Covers
DGT 3.0 compliant beacon requirements cover three things: light output, a secure magnetic base, and a connected signal. The device must be visible from a distance in all directions, stay put at speed, and send its location to the traffic network when activated.
In practice, a compliant unit offers:
- 360-degree visibility from the roof
- A geolocated signal sent over a mobile network
- Official approval against the technical standard
- A flashing light bright enough for nighttime visibility
If you already own a beacon and want to confirm it meets the spec, our guide on checking whether your beacon is DGT approved walks through the verification.
Is a DGT 3.0 Beacon Mandatory in Spain?
That matters if you commute or holiday there.
The requirement is part of a wider shift toward connected road safety: the beacon joins the emergency network and warns other drivers automatically. For the full legal picture, read our DGT 3.0 compliance guide.
Vehicle-Specific Mounting Challenges: Glass Roofs, Vans and Curved Panels
Not every roof accepts a magnet. This is where generic advice falls apart, and it is worth checking your own vehicle before you rely on a beacon. The sections below work through the four vehicle types that cause the most placement failures, with a fallback for each.
Panoramic glass roofs
A panoramic roof is glass bonded to a frame, so the magnet has nothing ferrous to grip. The fix is to find the steel frame at the perimeter of the glass panel, usually a strip 30-50 mm wide running around the opening.
Watch out: some panoramic roofs have an aluminium frame rather than steel, and a magnet will slide straight off. Test with a fridge magnet before you trust the spot.
Vans and high-roof vehicles
The roof of a panel van or high-roof MPV may sit well above head height, which makes a centred roof mount impractical at the roadside. Two options work:
- Use the highest metal panel you can reach safely, such as the top of the rear door or the upper section of the side panel, accepting a lower light height in exchange for a secure grip.
- Carry a step or use the vehicle’s own step, if fitted, to reach the roof. Only do this when it is safe to stand clear of traffic.
A bonnet mount is a last resort. It sits lower than the roof, throws light forward rather than in all directions, and puts the beacon in the path of spray from the front wheels.
Curved panels
Curvature is the most common cause of a beacon that looks secure but rocks at speed. The magnet grips at the centre and lifts at the edges, and vibration works the base loose. A flatter mounting point also keeps the beacon’s light unobstructed, while strobe lighting solutions depend on clear placement to remain visible from multiple angles.
Aluminium and composite bodywork
Many modern bonnets, tailgates and roof panels are aluminium or composite, neither of which a magnet will hold. Check with a fridge magnet before you rely on the spot. If no ferrous panel is reachable, the beacon cannot be roof-mounted on that vehicle, and you should plan an alternative warning method rather than risk the unit releasing at speed.
Test before you need it
Test your mounting point in daylight, on your own driveway, before you need it at the roadside. Press the base on, rock it, then try to slide it sideways. A base that holds against a firm sideways push will usually survive road vibration; one that slides will not.
Troubleshooting Connectivity and Testing Your Beacon
A beacon that will not connect is a beacon that will not alert the network. The checklist below is the routine test; the sections after it explain what to do when the test fails, because a failed connection at the roadside is a different problem from a failed connection on your driveway.
Monthly test routine
Work through this checklist:
- Press the test button and confirm the light fires
- Check the indicator shows a network connection
- Confirm the battery holds charge
- Re-test in an area with mobile signal
When the light works but the signal does not
This is the most common failure pattern, and it usually comes down to one of three causes:
- Coverage: the unit is in a dead spot. Move it a few metres, or test again from a different location. A beacon that connects in town but not in a rural layby is a coverage problem, not a fault.
- Flat or failing battery: a battery that holds enough charge for the light may not hold enough for the modem. Charge the unit fully and re-test before assuming the hardware has failed.
- Account or registration issue: some connected beacons need an active data plan or registration to reach the network. Check the unit’s status indicator against the manual.
Watch out: a beacon that shows a connection at home may still fail to connect in a remote area with weak signal. Treat the home test as a baseline, not a guarantee.
If the battery dies during an incident
The light is the priority. If the battery fails mid-incident, the beacon stops flashing, which removes the warning other drivers rely on. Carry a charged spare if your unit has a replaceable battery, or keep a power bank and cable in the glovebox if it charges over USB. If neither is available, fall back to hazard lights and get behind the barrier; do not stay in the carriageway trying to revive the unit.
If the beacon will not connect at the roadside
Activate the light first, then deal with the connection. A flashing beacon that has not reached the network still warns approaching drivers, which is the immediate risk. Once you are behind the barrier, retry the connection, and if it still fails, treat the incident as unconnected and make sure someone has called the emergency services by phone.
Our technical guide to beacon connectivity and power covers diagnosis in more depth.
Choosing a Beacon That Mounts and Connects Reliably
The right beacon grips hard, sits flat, and connects every time. Everything else is detail.
Look for:
- A magnetic base wide enough to resist vibration
- 360-degree light output rather than a single face
- GPS/geolocation for precise incident reporting
- DGT 3.0 certification, not a claim of compliance
Roadflash beacons are multi-award-winning early warning systems with GPS/Geolocation and high-visibility lighting, designed to protect drivers and passengers during breakdowns. If you are ready to choose, our guide on selecting the right V16 beacon for your car narrows it down by vehicle type.
| Priority | What to Check | Why It Matters |
|---|---|---|
| 1 | Magnetic base grip | Stops the beacon sliding at speed |
| 2 | 360-degree light spread | Seen from every approach angle |
| 3 | DGT 3.0 certification | Meets mandatory equipment rules |
| 4 | GPS/geolocation | Sends an accurate incident location |
| 5 | Battery and signal test | Confirms it works before you need it |
Breakdowns rarely happen in good conditions. The drivers who stay safe are the ones who have already decided where the beacon goes and how it activates.
Frequently Asked Questions
Where is the correct place to mount a V16 beacon on a vehicle?
Mount it on the roof, as close to the centre of the vehicle as the bodywork allows, avoiding glass and plastic trim. Never place it on the dashboard or inside the cabin, because glass and bodywork block the signal that approaching drivers see.
Can I place a V16 beacon inside the car?
No. Placing a V16 beacon inside the car defeats its purpose. The windscreen and roof pillars cut the light output and reduce the visibility distance dramatically, and the flashing light reflects off interior surfaces instead of projecting down the road. Keep it in the glove compartment or door pocket for quick access, then mount it outside as soon as it is safe to do so.
Is a DGT 3.0 beacon mandatory in Spain for all vehicles?
If you drive a Spanish-registered vehicle, check the current DGT requirements and confirm that your device carries DGT 3.0 certification.
What happens if my V16 beacon is not placed correctly?
A badly placed beacon reduces visibility distance, which is the exact risk it was bought to remove. Correct placement, combined with activating the device before you step away from the vehicle, helps the light and the emergency alert work as intended.
