
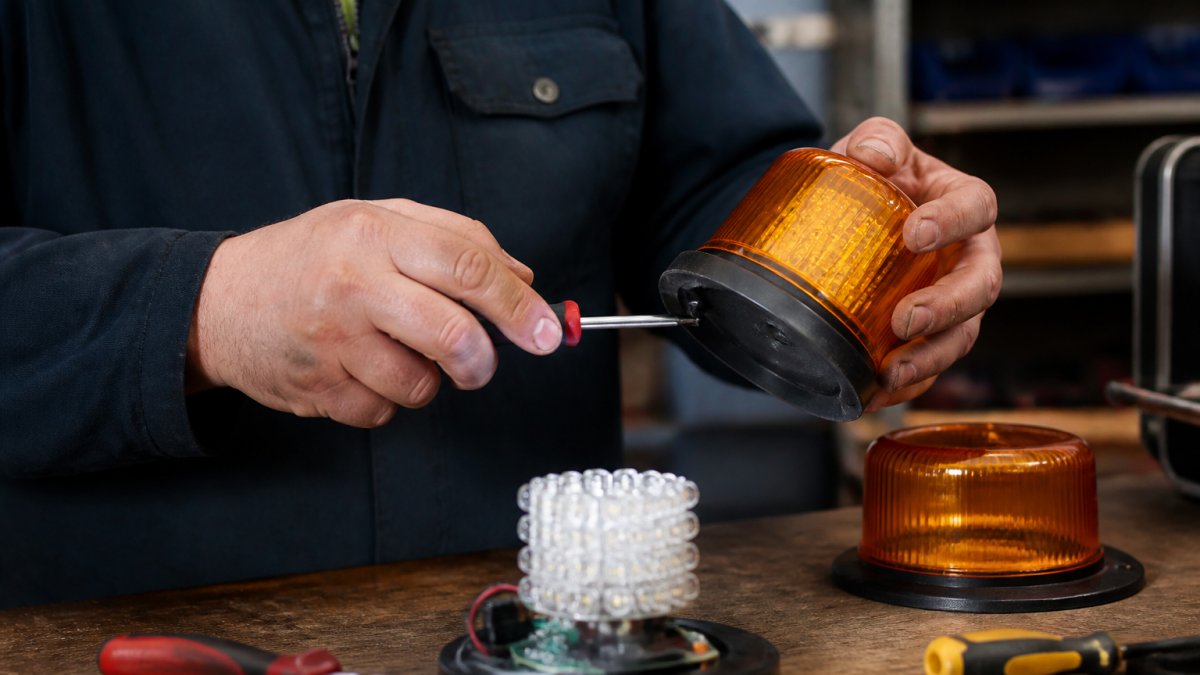
How to Maintain LED Warning Beacons for Longevity
Table of Contents
- Understanding LED Lifespan and Operating Hours
- The Role of Quality Power Supplies and LED Drivers
- Importance of Proper Ventilation and Heat Dissipation
- How to Clean Emergency Vehicle Lights
- Environmental Factors: Humidity, Temperature and UV Exposure
- LED Beacon Maintenance Schedule and Preventative Checks
- Signs of LED Beacon Failure and When to Replace
- Troubleshooting Common Beacon Issues
- Frequently Asked Questions
Last Updated: September 28, 2026
Understanding LED Lifespan and Operating Hours
To maintain LED warning beacons effectively and ensure they last far longer than traditional incandescent lights, you need to understand their design and operating characteristics. Most quality LEDs operate for 25,000 to 50,000 hours before significant light output drops. That’s roughly 3 to 6 years of continuous operation, or 10 to 20 years if used intermittently.
However, lifespan depends on more than just the LED itself. The luminaire, power supply, and environmental conditions all play critical roles. A beacon that sits in harsh weather without proper maintenance will fail much sooner than one that’s cared for regularly.
The key insight most people miss: operating hours matter less than how you treat the beacon between uses. A beacon left exposed to moisture and temperature swings will degrade faster than one that’s maintained proactively.
Understanding what affects lifespan helps you make smarter maintenance decisions:
- LEDs dim gradually over time (lumen depreciation)
- Heat is the biggest enemy of LED longevity
- Voltage fluctuations damage components faster than steady power
- Environmental stress compounds other wear factors
Our multi-award-winning warning beacons are built to withstand the demanding conditions of motorway breakdowns and roadside operations.
Track your beacon’s operating hours if possible. Many modern units log this data. Knowing when you’re approaching 40,000 hours helps you plan replacement before failure occurs.
The Role of Quality Power Supplies and LED Drivers
Your LED beacon is only as reliable as the power supply feeding it. A poor-quality driver or unstable power source will kill even the best LED long before its rated lifespan expires.
Quality LED drivers do three critical things: they regulate voltage, prevent current spikes, and protect against power surges. Cheap drivers skip these steps, which means your beacon gets exposed to electrical stress every time you switch it on.
Voltage fluctuations are particularly damaging. When voltage jumps or dips, it forces the LED to work harder or shut down unexpectedly. Over time, this cycling damages the semiconductor inside the LED itself.
Here’s what separates a reliable setup from a failing one:
- Stable drivers maintain consistent voltage within tight tolerances
- Quality power supplies include surge protection
- Circuit protection prevents damage from electrical faults
- Thermal management keeps driver components cool
If you’re using a beacon with a low-quality power supply, you’re essentially running a countdown timer. The beacon might work fine for weeks, then fail suddenly without warning.
Roadflash beacons use industrial-grade drivers and power supplies designed for the unpredictability of roadside conditions. This investment in component quality is why our beacons earn multi-award recognition.
Never use a power supply rated below the beacon’s specification. Undersized supplies force the driver to work harder, generating excess heat and shortening lifespan dramatically.
Importance of Proper Ventilation and Heat Dissipation
Heat is the silent killer of LED warning beacons. Even though LEDs run cooler than incandescent bulbs, they still generate heat that must escape. If heat builds up inside the fixture, it damages the LED, driver, and electrical connections.
Proper ventilation means air can flow around the beacon’s housing. Blocked vents trap heat inside, causing temperatures to rise 20 to 30 degrees above ambient levels. This accelerates component failure and reduces light output.
The heat sink inside your beacon is designed to pull heat away from the LED. But it only works if air can reach it. Dust, dirt, and debris block airflow and reduce thermal management effectiveness.
Ventilation best practices:
- Keep beacon vents clear of debris
- Mount beacons where air can circulate freely
- Avoid enclosing beacons in tight spaces
- Check vents monthly during high-dust seasons
- Clean vents with compressed air if dust accumulates
If your beacon is mounted on a vehicle, make sure the mounting bracket doesn’t block airflow. Some mounting positions trap hot air around the fixture, causing overheating even when vents are clear.
A beacon running 10 degrees cooler will last significantly longer. Proper ventilation is one of the simplest and most effective maintenance steps you can take.
How to Clean Emergency Vehicle Lights
Dirt, salt spray, and road grime reduce light output by blocking the lens. A dirty beacon loses 20 to 30 percent of its brightness, making it less visible to approaching traffic. Cleaning is quick but must be done carefully to avoid damage.

Use only soft, lint-free cloths when cleaning. Paper towels and rough fabrics scratch the lens and housing. Scratches scatter light and reduce visibility.
For the lens itself, use distilled water and a microfiber cloth. Distilled water prevents mineral deposits that tap water leaves behind. Avoid harsh chemicals, solvents, or abrasive cleaners.
Step-by-step cleaning:
- Turn off the beacon before cleaning
- Wait 10 minutes for the fixture to cool
- Wipe the lens gently with a damp lint-free cloth
- Dry with a separate clean cloth
- Check the housing for cracks or damage
- Inspect vents and clear any visible debris
For stubborn grime, soak the cloth in distilled water for a few minutes before wiping. Let the water do the work rather than scrubbing hard.
Never use compressed air directly on the lens. The force can damage seals and push moisture inside the fixture. Use compressed air only on vents and external surfaces.
After cleaning, inspect the entire beacon for signs of damage. Cracks in the housing allow moisture inside, which accelerates failure. Small cracks can be sealed with clear silicone caulk designed for outdoor use.
Environmental Factors: Humidity, Temperature and UV Exposure
Environmental stress is the primary reason beacons fail prematurely. Humidity causes corrosion inside electrical connections. Temperature swings stress sealants and housing materials. UV exposure degrades plastic components over time.
Moisture ingress is the most dangerous threat. Water inside the fixture corrodes wiring, contacts, and circuit boards. Once corrosion starts, it spreads quickly and causes electrical faults.
Beacons with high IP ratings resist moisture better. IP67 means the fixture is waterproof under temporary immersion. IP68 means it can handle continuous submersion. Check your beacon’s IP rating and understand its limitations.
Temperature extremes also damage components. Rapid temperature changes cause expansion and contraction, which stresses sealants and connections. A beacon that goes from freezing to hot sun experiences stress every day in winter.
UV exposure degrades plastic housings and lenses. Over time, UV breaks down polymer materials, making them brittle and prone to cracking. Clear protective coatings help, but they eventually wear away.
Environmental protection strategies:
- Mount beacons away from direct water spray when possible
- Avoid mounting in areas with high salt exposure (coastal regions)
- Use protective covers during extended storage
- Inspect seals and gaskets annually for degradation
- Replace damaged housing before water enters the fixture
- Apply UV-protective coatings to plastic components
In harsh environments, beacons need more frequent inspection.
LED Beacon Maintenance Schedule and Preventative Checks
A structured maintenance schedule is essential to maintain LED warning beacons and prevent most beacon failures. Regular checks catch problems early, before they become dangerous. Preventative maintenance also extends the beacon’s useful life significantly.
Monthly checks take 10 minutes and catch most issues:
- Inspect the lens for cracks or cloudiness
- Wipe away dirt and debris
- Check for corrosion around the mounting bracket
- Verify the beacon powers on and off correctly
- Listen for unusual sounds during operation
Quarterly inspections go deeper:
- Remove the beacon (if accessible) and inspect all connections
- Check for moisture inside the housing
- Test brightness with a light meter if available
- Inspect the power supply for signs of damage
- Clean vents thoroughly with compressed air
Annual maintenance includes:
- Full disassembly and inspection of all components
- Replacement of gaskets and seals if degraded
- Testing of the LED driver with diagnostic equipment
- Inspection of the heat sink for corrosion
- Verification that the beacon meets original light output specifications
Set calendar reminders for monthly checks. Most beacon failures are preventable with consistent, simple maintenance. Skipping checks almost always leads to unexpected failure at the worst time.
Signs of LED Beacon Failure and When to Replace
Knowing the warning signs of LED beacon failure helps you replace units before they stop working entirely. Some failures are gradual. Others happen suddenly.
When to replace your beacon:
- Light output drops below 70 percent of original brightness
- Flickering or intermittent operation persists after tightening connections
- Physical cracks appear in the housing or lens
- Corrosion is visible on electrical components
- The beacon has been in service for 8 to 10 years in harsh conditions
- Water is visibly inside the fixture
Troubleshooting Common Beacon Issues
Most beacon problems have simple causes that you can diagnose and fix yourself. Start with the simplest explanations before assuming component failure.
Frequently Asked Questions
How long do LED warning beacons typically last?
LED warning beacons typically deliver 50,000 to 100,000 operating hours under normal conditions, which translates to 5-10 years of continuous use depending on duty cycle and environmental exposure. Actual lifespan depends heavily on heat dissipation, power supply quality, and maintenance frequency. Beacons in high-vibration or corrosive environments may degrade faster. Regular preventative maintenance and proper ventilation can extend operational life significantly.
What is the recommended LED beacon maintenance schedule?
Perform visual inspections monthly to check for moisture, corrosion, or physical damage. Clean the lens and housing quarterly using a lint-free cloth to remove dust and salt spray. Check electrical connections and wiring harness every six months for corrosion or looseness. Before long journeys or seasonal changes, verify the power supply voltage and test the beacon’s light output. Annual professional servicing is recommended for high-use or critical-safety applications.
What are the signs that an LED beacon needs replacing?
Watch for reduced light output, flickering, or dimming performance that doesn’t improve with cleaning. Physical cracks in the luminaire housing, moisture inside the lens, or corrosion on electrical connections indicate component failure. If the beacon fails to illuminate after power is confirmed, the LED driver or internal circuitry may be damaged. Any sign of lumen depreciation below 70% of original brightness signals that replacement should be scheduled soon.
How does weather exposure affect LED beacon performance?
Moisture ingress from rain and humidity accelerates corrosion of electrical connections and can damage the LED driver. UV exposure degrades the lens clarity and housing material over time. Temperature fluctuations cause voltage fluctuations in the power supply, stressing components. Salt spray in coastal or winter road-treatment environments is particularly corrosive. High ambient temperatures reduce LED lifespan by increasing thermal stress, while cold temperatures can affect dimming performance. An IP rating of at least IP65 provides essential weatherproofing for roadside beacons.