

How to Use Emergency Beacons Safely
Table of Contents
- When to Activate an Emergency Beacon
- How Emergency Beacons Work: Signal Transmission and Detection
- Registration and Emergency Contacts Setup
- Best LED Road Safety Beacons 2026: Features That Matter
- Vehicle Breakdown Safety Procedures: Step-by-Step Response
- DGT 3.0 Compliant Beacons UK: Regulatory Requirements and Compliance
- Beacon Maintenance and Battery Testing
- Common Mistakes to Avoid When Using Emergency Beacons
Last Updated: August 19, 2026
When to Activate an Emergency Beacon
Activate your emergency beacon only during life-threatening emergencies requiring immediate assistance. A flat tyre or engine failure, while inconvenient, doesn’t warrant activation unless your safety is imminently at risk. Activate if you’re stranded in hazardous conditions: on a busy motorway during heavy traffic, in severe weather, in a remote location without mobile signal, or if you’re injured and unable to reach help through conventional means.
Before pressing the activation button, take thirty seconds to assess whether your situation genuinely requires satellite-based rescue. Can you safely exit the vehicle? Is your mobile phone working? Are other motorists nearby? If the answer to any of these is "no" and you’re in genuine danger, activate immediately. Weather extremes change the calculus entirely, a breakdown during a blizzard with near-zero visibility or stranded in fog on a motorway at night with heavy traffic warrants immediate activation.
Activating your beacon triggers an international search and rescue response. Once activated, emergency services will attempt contact and dispatch resources. Have your vehicle’s location and situation details ready to communicate immediately when they call.
How Emergency Beacons Work: Signal Transmission and Detection
Emergency beacons function through the COSPAS-SARSAT satellite constellation, an international system that monitors emergency frequencies 24/7. When you activate your beacon, it broadcasts a distress alert containing your GPS coordinates, device registration information, and emergency contact details to receiving stations on Earth.
Signal transmission requires a clear view of the sky. Your beacon communicates with satellites orbiting at approximately 800 kilometres altitude. Dense forests, deep canyons, or enclosed spaces significantly delay detection. Modern beacons include GPS capability, providing precise coordinates within metres rather than relying solely on satellite triangulation, dramatically improving rescue response accuracy.
Detection typically occurs within minutes of activation. Once detected, the signal is relayed to rescue coordination centres, which immediately contact your registered emergency contacts and dispatch appropriate resources. The entire process usually takes fewer than fifteen minutes. Signal strength depends on antenna orientation, a beacon mounted on your vehicle’s roof transmits more effectively than one buried in a glove compartment.
Battery life directly impacts signal duration. Most emergency beacons operate for 48 hours of continuous transmission, though cold weather reduces battery performance, sometimes cutting operational life by half. This is why beacon maintenance and regular battery testing are essential.
The beacon’s effectiveness depends on three factors: clear sky visibility, accurate GPS coordinates from registration, and sufficient battery charge.
Registration and Emergency Contacts Setup
Your emergency beacon must be registered with the appropriate authorities before it becomes operational. In the UK, beacons are registered with the Coastguard and relevant maritime or aviation authorities. Registration links your device’s unique identifier to your personal information, emergency contact details, and vehicle registration.
You’ll provide your name, address, contact phone numbers, emergency contact names and numbers, and vehicle details. This information is stored in a searchable database that rescue coordination centres access immediately when your beacon activates. Incomplete or outdated registration delays rescue response.
Emergency contacts should be people who know your typical travel patterns and can provide additional context to rescuers. Update your registration whenever your contact details change. Many drivers register their beacon once and never revisit the information. Annual registration reviews are sensible practice, particularly before long journeys or seasonal changes.
Best LED Road Safety Beacons 2026: Features That Matter
When selecting an emergency beacon for vehicle use, LED visibility, battery endurance, GPS accuracy, and durability in extreme weather are the primary decision factors. A beacon that fails to transmit in cold weather or loses signal in cloud cover creates false confidence in your safety.
Roadflash emergency beacons are specifically engineered for stationary vehicle scenarios on motorways and highways. Their multi-award-winning design combines high-visibility LED lighting with strong satellite signal transmission. The GPS/Geolocation feature provides precise coordinates to rescue services, and DGT 3.0 compliance ensures legal compliance in Spain and other European markets.
The LED component provides immediate visual warning to approaching traffic, reducing collision risk during breakdown. This is critical during daylight hours when hazard lights alone may not provide sufficient visibility. The beacon’s bright LED pulses are visible from hundreds of metres away, giving oncoming traffic crucial seconds to react.
Battery performance in cold weather separates premium beacons from basic alternatives. Roadflash beacons maintain reliable transmission in sub-zero conditions. Durability matters more than aesthetics, your beacon will experience vibration, temperature swings from -10°C to +40°C, and moisture exposure.
Cheaper beacons often use low-quality GPS modules that struggle to acquire satellite locks in poor visibility. Invest in a beacon with proven GPS reliability rather than the lowest-cost option.
Vehicle Breakdown Safety Procedures: Step-by-Step Response
The moment your vehicle breaks down on a motorway, your immediate priority is safety. Turn on your hazard lights, assess whether you can safely move the vehicle to the hard shoulder, and exit only when stationary and away from moving traffic.
Step 1: Activate Hazard Lights and Move to Safety (Time: 1-2 minutes)
Hazard lights alert approaching traffic. If you’re on a live lane, attempt to move to the hard shoulder or emergency refuge area. If your vehicle won’t move, remain inside with seatbelts fastened until traffic clears, then exit away from the roadside.
Step 2: Exit the Vehicle and Move to Safety (Time: 1 minute)
Exit immediately and move away from the vehicle, preferably behind a safety barrier. Stand well away from the roadside, at least three metres, to avoid being struck by debris or vehicles drifting across the hard shoulder.
Step 3: Assess Your Situation (Time: 2-3 minutes)
Determine whether you need immediate rescue or can wait for roadside assistance. Is your vehicle blocking traffic? Are you injured? Is weather deteriorating? Is mobile signal available?
Step 4: Contact Roadside Assistance or Emergency Services (Time: 2-5 minutes)
If you have mobile signal, contact your breakdown cover provider or emergency services. Provide your location using motorway marker posts, vehicle details, and situation description. If mobile signal is absent or you’re in genuine danger, activate your emergency beacon.
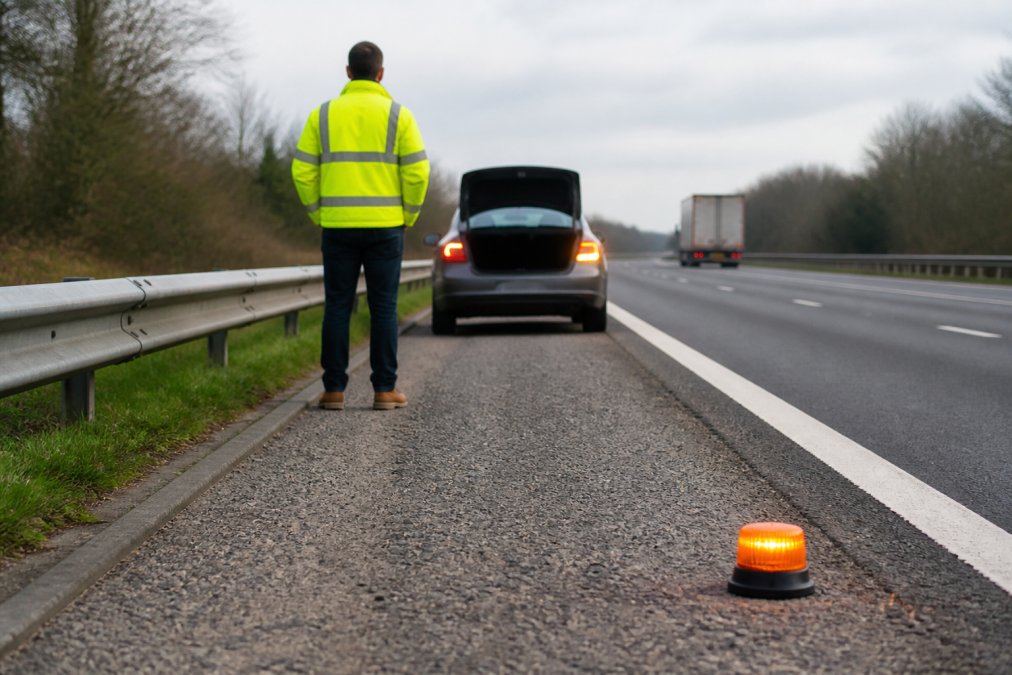
Step 5: Activate Your Emergency Beacon (Time: 1 minute)
If activation is necessary, press and hold the activation button until the beacon powers on and begins transmitting. Most beacons require 5-10 seconds of continuous pressure to activate, preventing accidental triggering. Once activated, the beacon’s LED will pulse visibly and the device will begin transmitting your GPS coordinates.
Step 6: Remain with Your Vehicle (Time: variable)
Unless weather or traffic danger forces you to move, stay with your vehicle. Rescue services will attempt to contact you using the emergency contact numbers registered with your beacon. Answer your phone immediately if called.
Step 7: Communicate Post-Rescue (Time: 5-10 minutes)
Once rescue services arrive, provide them with your beacon device for their records. Explain your situation clearly and follow their guidance.
Motorists who frequently drive motorways for work or long-distance travel. Breakdown scenarios on busy highways create genuine danger that conventional roadside assistance may not address quickly enough.
DGT 3.0 Compliant Beacons UK: Regulatory Requirements and Compliance
Spain’s Dirección General de Tráfico (DGT) introduced the 3.0 standard to establish minimum safety requirements for emergency warning devices. If you’re driving in Spain or regularly cross the Spanish border, your emergency beacon must meet DGT 3.0 specifications or you risk fines and vehicle impoundment.
DGT 3.0 compliance requires specific technical standards: minimum LED brightness, specific colour wavelengths (amber/orange), signal transmission frequencies, and GPS accuracy tolerances. The standard mandates that beacons include both visual (LED) and electronic (satellite) warning capabilities.
Roadflash beacons are engineered to DGT 3.0 specifications, making them legal throughout Spain and other European markets adopting equivalent standards. The LED brightness requirement exists because stationary vehicles on Spanish motorways face significant collision risk from high-speed traffic. DGT 3.0 requires brightness sufficient to be visible from at least 300 metres in daylight conditions, giving approaching drivers adequate time to react.
GPS accuracy standards ensure rescue services receive coordinates precise enough to locate your vehicle quickly. The standard requires horizontal accuracy within 100 metres, though modern GPS modules typically achieve 5-10 metres accuracy. This precision matters on motorways where multiple vehicles might be broken down across several kilometres.
Beacon Maintenance and Battery Testing
Your emergency beacon requires regular maintenance to ensure reliability when needed. Most users purchase a beacon and install it without ever testing whether it functions.
Monthly Visual Inspection (Time: 2 minutes)
Check that your beacon is securely mounted and free from damage. Inspect the LED lens for cracks or condensation. Verify that the activation button operates smoothly. Look for corrosion around battery compartment seals, particularly if your vehicle is parked in damp conditions.
Quarterly Battery Testing (Time: 5 minutes)
Most emergency beacons include a battery status indicator. Press the test button monthly and verify that the status indicator shows adequate charge. If the indicator shows low battery, replace the batteries immediately.
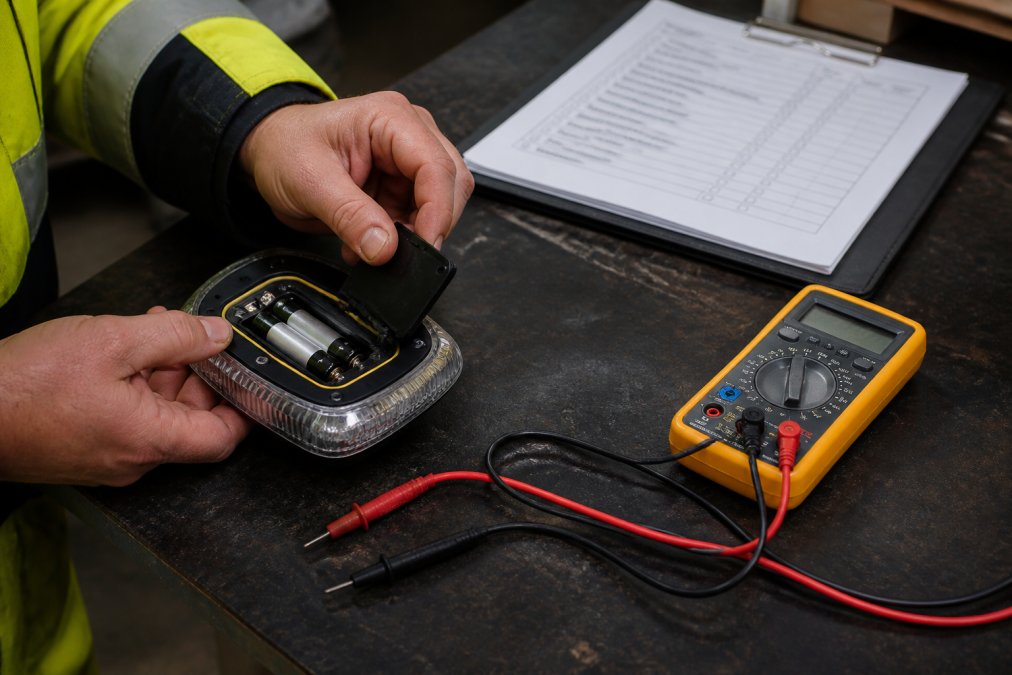
Annual Professional Testing (Time: 10-15 minutes)
Once yearly, perform a full functional test. Activate your beacon in test mode (if your model includes this feature) and verify that the LED illuminates and the device begins transmitting. If your beacon doesn’t include a test mode, contact the manufacturer or a qualified technician for testing.
Battery Replacement Schedule
Replace batteries annually if you own the beacon, or whenever the status indicator shows low charge. Lithium batteries perform better in cold weather and last longer in storage. Keep spare batteries stored in your vehicle alongside your beacon.
Cold Weather Performance Testing
If you live in a harsh winter climate, test your beacon’s cold weather performance. Place it in a freezer at -10°C for two hours, then test battery voltage and LED brightness. This reveals whether your beacon will function reliably during winter breakdowns.
Corrosion Prevention
Store your beacon in a dry location when not in use. If your vehicle is parked outdoors, consider removing the beacon during extended periods of non-use.
Common Mistakes to Avoid When Using Emergency Beacons
Mistake 1: Activating During Non-Emergency Situations
Drivers frequently activate beacons for minor breakdowns, lost keys, or running out of fuel. These situations are inconvenient but not emergencies. Activating your beacon for non-emergencies wastes rescue services’ resources and can result in fines.
Mistake 2: Failing to Register Your Beacon
An unregistered beacon transmits a signal that rescue services can detect, but they have no way to identify you or contact your emergency contacts. Registration takes fifteen minutes and is absolutely essential.
Mistake 3: Never Testing Your Beacon
Test your beacon annually. Verify that the LED illuminates, the battery status indicator shows adequate charge, and the device powers on reliably. A beacon that fails when you actually need it provides zero safety benefit.
Mistake 4: Ignoring Battery Replacement Schedules
Alkaline batteries lose charge gradually even when not in use. A beacon purchased three years ago is now running on batteries that have lost 40-50% of their original capacity. Reduced battery voltage may result in weak signal transmission that takes longer for satellites to detect.
Mistake 5: Activating Without Clear Sky Visibility
Activating your beacon inside a vehicle with windows closed or in a dense forest dramatically reduces signal reception. Exit the vehicle and hold the beacon at arm’s length with clear sky visibility above.
Mistake 6: Panic Activation Without Situation Assessment
Before pressing the activation button, take thirty seconds to assess whether your situation genuinely requires satellite-based rescue. Panic-driven decisions often lead to false alarms.
Mistake 7: Assuming Your Beacon Works Without Maintenance
Beacons are reliable devices, but they’re not maintenance-free. Batteries degrade, seals fail, and corrosion develops. Regular testing and maintenance ensure your beacon functions when you actually need it.
Mistake 8: Forgetting to Update Registration After Moving
Update your beacon registration whenever your contact details or vehicle changes. When you activate it during an emergency, rescue services need current information to reach you.
Emergency beacons exist to save lives during genuine crises. Their effectiveness depends on proper registration, regular maintenance, correct activation procedures, and realistic assessment of when activation is genuinely necessary. A well-maintained beacon registered with current contact information provides invaluable peace of mind during long motorway journeys or remote area travel.
Roadflash emergency beacons combine high-visibility LED warning systems with strong satellite signal transmission, providing motorists with comprehensive breakdown protection. Their GPS/Geolocation capability ensures rescue services receive precise coordinates, and DGT 3.0 compliance guarantees legal compliance across European markets. For drivers who frequently travel motorways or remote areas, investing in a quality emergency beacon transforms breakdown scenarios from potentially life-threatening crises into manageable situations where help arrives reliably and quickly. Add a Roadflash beacon to your vehicle today and drive with genuine confidence that you’re equipped for genuine emergencies.
Frequently Asked Questions
When should you deploy an emergency beacon on a motorway?
Deploy your emergency beacon immediately if your vehicle breaks down, you are involved in an accident, or you experience a life-threatening emergency. Activate it before exiting your vehicle to alert search and rescue services and other road users. The sooner you signal, the faster emergency response teams can locate you. On busy motorways, every second counts, activation should be your first action after ensuring your safety and moving to a safe location away from traffic.
How do GPS-enabled emergency beacons improve roadside safety?
GPS-enabled beacons transmit your exact coordinates to emergency services via satellite networks, eliminating guesswork about your location. This dramatically reduces response times, especially in remote or poorly marked areas. Unlike traditional distress signals, GPS beacons pinpoint your position to within metres, allowing rescue teams to reach you faster. Combined with your registered emergency contacts and vehicle details, GPS beacons ensure that help arrives prepared and informed about your situation.
How often should I check my emergency beacon batteries?
Test your beacon battery at least every three months or before long journeys. Most beacons have a self-test function, activate it in test mode (not emergency mode) to verify the battery is functional without triggering a false alarm. Check the battery expiry date and replace batteries according to the manufacturer's schedule, typically annually or when the indicator shows low charge. A dead battery renders your beacon useless in an actual emergency, so regular testing is essential for roadside protection.
Do emergency beacons replace the need for hazard warning lights?
No, emergency beacons and hazard lights serve different purposes and should be used together. Hazard lights alert nearby drivers to your stationary vehicle, while emergency beacons signal emergency services and search and rescue teams via satellite networks. During a breakdown, activate both: hazard lights for immediate motorway safety and your beacon to ensure emergency response. The combination provides comprehensive protection for you and other road users.
This article was written using GrandRanker