
Emergency Beacon Mounting Locations for Storms
Table of Contents
- Why Emergency Beacon Mounting Locations Matter During Storms
- Where to Mount a Car Emergency Beacon for Maximum Visibility
- Magnetic Emergency Beacon Roof Mounting: Setup and Security
- Emergency Beacon Visibility in Rain and Poor Weather
- Vehicle Breakdown Safety in Storms: Pre-Deployment Readiness
- Setting-Specific Mounting: Home, Vehicle, Boat, and Campsite
- Beacon Types and Mounting Compatibility
- Maintenance and Testing of Mounted Emergency Beacons
- Frequently Asked Questions
Last Updated: October 8, 2026
Why Emergency Beacon Mounting Locations Matter During Storms
When your vehicle breaks down on a motorway in severe weather, a stationary car disappears quickly into rain, fog, or darkness.
Mounting location determines signal strength, visibility range, and whether your GPS coordinates transmit to emergency services.
A well-positioned emergency beacon with GPS geolocation broadcasts your exact location to search and rescue teams within minutes, even when visibility is near zero.
This guide covers mounting strategies that maximise signal strength, ensure visibility in poor weather, and keep your beacon secure.
Where to Mount a Car Emergency Beacon for Maximum Visibility
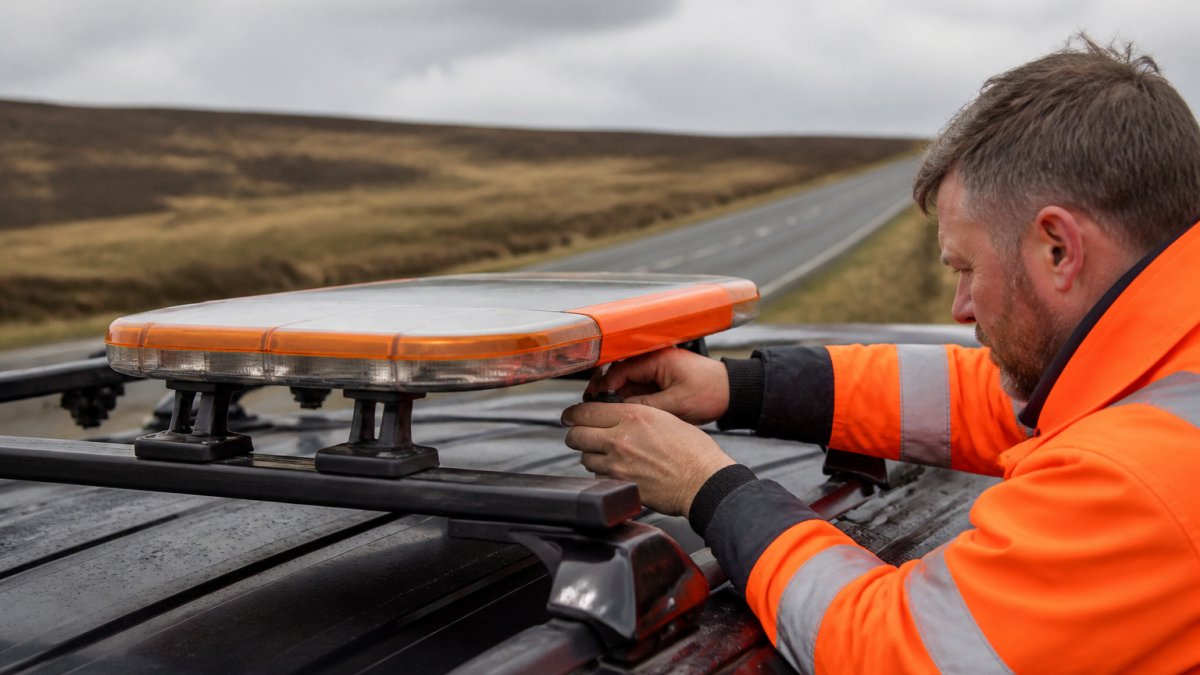
The roof is the gold standard for emergency beacon mounting on vehicles: your signal travels farther, and approaching drivers spot the light from greater distances.
Roof mounting for optimal signal reach
A roof-mounted emergency beacon sits above most obstructions, and radio and GPS signals travel in straighter lines from higher positions. During storms, a beacon six feet above ground level reaches satellites and receivers a dashboard-mounted unit might miss.
The trade-off is security. Roof-mounted beacons face wind pressure and vibration from passing traffic. They require a mounting bracket designed for vehicle movement and weather exposure. A loose beacon becomes a projectile in a storm.
Dashboard and windscreen placement considerations
Dashboard mounting keeps the beacon inside the vehicle, protected from weather and theft, with the antenna against the windscreen. It works best for shorter journeys.
Windscreen suction-cup mounts are quick to install but unreliable in storms: suction fails in cold weather, and vibration can dislodge the beacon. Permanent adhesive or bracket mounting is more stable.
Rear bumper and side panel alternatives
Rear bumper mounting places the beacon where approaching traffic sees it first, which suits motorway breakdowns where most hazards come from behind. It sits lower than roof height but remains visible within 100-150 metres.
Both rear and side placements sacrifice signal strength: the antenna is lower, and metal body panels can shield the signal.
Magnetic Emergency Beacon Roof Mounting: Setup and Security
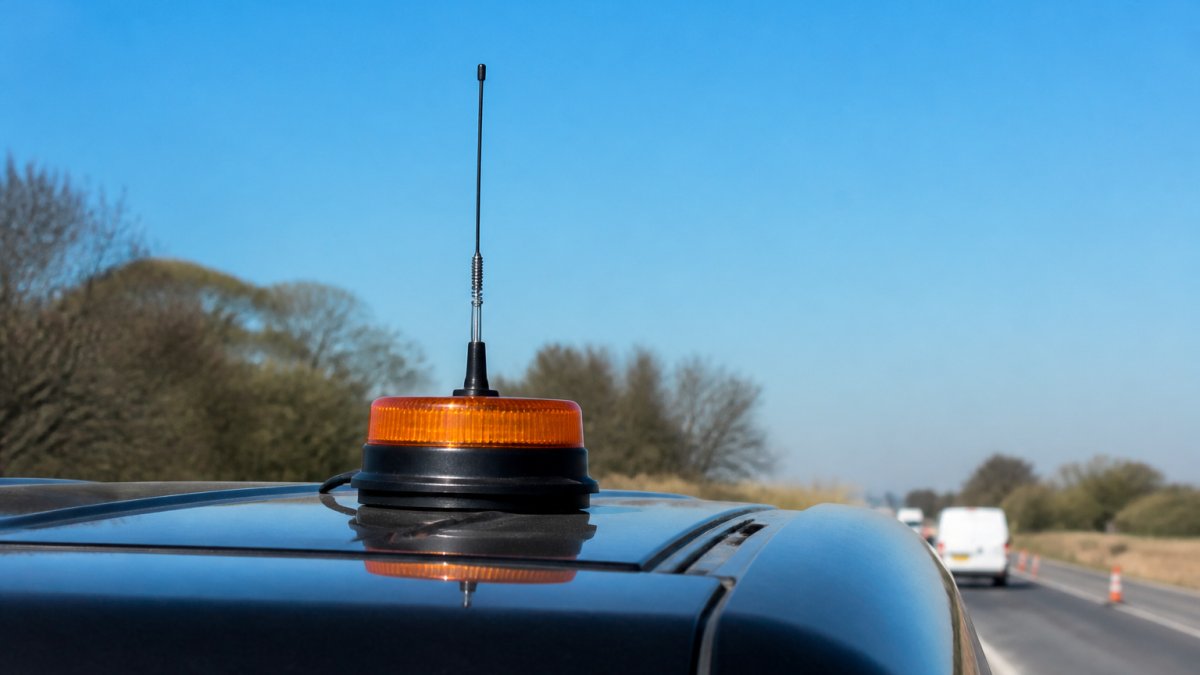
Magnetic mounting systems install in seconds without permanent roof modifications. A strong neodymium magnet grips the roof securely even at motorway speeds, and you can reposition the beacon.
Selecting the right mounting surface
Not all roof surfaces work equally well with magnetic mounts: steel and iron grip firmly, aluminium roofs have poor adhesion, and fibreglass or plastic panels won’t hold a magnet at all.
Before purchasing a magnetic beacon, check your vehicle’s roof material; manufacturers specify whether their magnets suit your vehicle type.
The mounting surface must be clean and dry, since dirt, rust, or corrosion reduces magnetic grip. Wipe the roof with a dry cloth before mounting, and in wet conditions dry the surface completely first.
Checking magnetic grip strength before travel
Test your beacon’s grip before relying on it: mount it and try to move it by hand. It should not shift or rotate.
Drive at normal speeds with the beacon mounted and listen for vibration. A beacon that holds at 30 mph may slip at 70 mph, so test at speed on a quiet road before long journeys.
Check the magnetic grip every few months: roof corrosion or paint buildup can weaken adhesion, so clean the contact area and retest if it loosens.
Emergency Beacon Visibility in Rain and Poor Weather
Rain, fog, and darkness are when you need your beacon most, and a beacon that works in daylight but fails in storms gives false confidence. Antenna orientation and weatherproofing determine whether it transmits when conditions are worst.
Antenna orientation and line-of-sight principles
GPS and satellite signals travel in straight lines, so an antenna pointing sideways or downward misses them. Point it upward, perpendicular to the ground, for maximum signal strength.
Many beacons include a directional or vertical whip antenna. Position it pointing directly upward, not angled toward the windscreen or tilted by wind, and check the manufacturer’s guidance.
Line of sight matters even more in storms: dense cloud doesn’t block GPS signals, but large metal structures do.
Signal obstruction and weatherproofing checks
Water doesn’t block GPS or satellite signals, but it can damage electronics if the beacon isn’t sealed. A beacon rated IP67 or higher resists rain, spray, and submersion, so check the IP rating before purchasing.
The antenna connection is a common failure point: water seeping into the connector corrodes the contact and breaks the signal.
Before winter or storm season, test your beacon’s signal strength in wet conditions using its indicator light or app.
Vehicle Breakdown Safety in Storms: Pre-Deployment Readiness
A mounted beacon is only useful if you remember to activate it, and many drivers forget during the stress of a breakdown. Pre-deployment checks ensure it’s ready when you need it.
Testing beacon activation and GPS registration
Activate your beacon monthly, even without a breakdown.
GPS acquisition takes 30-60 seconds in clear conditions and longer in storms or urban canyons. Press the activation button and wait for the GPS light to confirm a location lock.
Register your beacon with the manufacturer or search and rescue services if required, so emergency services know who to contact when a distress signal arrives. A beacon with no contact information delays rescue response.
Creating a storm-specific emergency kit
Your beacon is one part of a complete breakdown kit. During storms, include high-visibility clothing, a torch with spare batteries, and a charged mobile phone.
Keep the beacon accessible: a portable unit belongs in the glove compartment or centre console, not the boot. During a breakdown you have seconds to activate it before the next vehicle arrives.
Setting-Specific Mounting: Home, Vehicle, Boat, and Campsite
Emergency beacons aren’t just for motorway breakdowns. Different settings require different mounting strategies.
Vehicle-mounted beacons for motorway safety
Motorway breakdowns happen fast: you pull over, activate your beacon, and wait.
Position the beacon toward the rear of the roof so approaching drivers see it clearly. Test this from a distance in a safe location.
For professional drivers or fleet operators, consider dual beacons on the roof and rear bumper so one continues transmitting if the other fails. Roadflash emergency beacons with GPS geolocation are designed to enhance motorist safety.
Marine and offshore mounting for water exposure
Boats present unique challenges: salt water corrodes unprotected electronics, and constant motion stresses mounting brackets. A marine beacon must be waterproof, corrosion-resistant, and secure against wave action.
Mount the beacon on the highest point of the vessel, typically the mast or cabin roof, to maximise signal range and visibility.
Use stainless steel or marine-grade brackets rated for salt water, since galvanised or painted steel corrodes quickly. Marine use demands IP67 or higher, and the beacon should be inspected monthly.
Campsite and outdoor emergency beacon placement
Campsites and remote outdoor locations lack motorway infrastructure. A vehicle-mounted beacon works, but if you’re hiking away from the vehicle, a portable personal locator beacon becomes essential.
For vehicle-based camping, roof mounting gives the best signal and visibility.
At a campsite, mount the beacon on a high point such as a tent pole, vehicle roof, or tripod, never inside a tent where fabric and metal frame block signals.
Beacon Types and Mounting Compatibility
Not all emergency beacons mount the same way, so understanding the differences helps you choose the right device and method.
Personal locator beacons versus vehicle-mounted systems
Personal locator beacons (PLBs) are compact, lightweight devices for individual use, ideal for hiking, mountaineering, or maritime activities. They use satellite networks to transmit distress signals and GPS coordinates.
Vehicle-mounted beacons are larger, more powerful, and designed for permanent installation, with stronger signals, longer battery life, and features like two-way messaging or GPS tracking.
A PLB needs a secure pocket, chest strap, or small bracket; a vehicle beacon needs roof access and weatherproof installation. Motorway drivers benefit from vehicle-mounted beacons, while hikers and sailors benefit from PLBs.
GPS satellite messengers and two-way communication
Satellite messengers combine GPS tracking with two-way messaging, letting you send and receive texts via satellite even without mobile signal, so you can communicate your situation to rescue services or family.
The advantage of two-way communication is confirmation that emergency services received your signal; a one-way beacon transmits your location but gives no feedback.
Maintenance and Testing of Mounted Emergency Beacons
A beacon that hasn’t been tested in months may fail when you need it. Maintenance and testing separate a working safety device from a false sense of security.
Regular visibility and accessibility checks
Every month, inspect your mounted beacon for corrosion, loose connections, or damage from weather or road debris, and check that the magnetic grip remains firm or that bolts and brackets are tight.
Test the beacon’s power and signal in test mode, confirming the lights blink, the GPS acquires a location, and the antenna connection is secure.
Ensure the beacon remains accessible, and practise retrieving and activating it. The first time you use it shouldn’t be during a real breakdown.
Battery life and service intervals
Most beacons use rechargeable or replaceable batteries. Check the manufacturer’s specifications for battery life and replacement intervals, which range from annually to every few years.
Keep spare batteries in your vehicle, since a beacon with a dead battery is useless.
Some beacons need professional servicing at regular intervals, including cleaning, recalibration, or replacement of internal components.
Emergency beacon mounting locations determine whether your device transmits when you need it most. Proper placement, secure attachment, and regular testing transform a beacon into a reliable lifeline during motorway breakdowns and storms.
Frequently Asked Questions
Where should you mount an emergency beacon on a vehicle?
Mount your emergency beacon on the roof for optimal signal reach and visibility, especially during storms. Roof mounting ensures the antenna has clear line of sight to satellites and is visible to approaching traffic. If roof mounting isn’t possible, dashboard or windscreen placement works as a secondary option, though signal strength may be reduced. Avoid mounting inside the vehicle or in areas blocked by metal structures, as these obstruct satellite and GPS signals. Test your chosen location before relying on it during an emergency.
How do you keep an emergency beacon visible in heavy rain or fog?
Ensure your emergency beacon mounting location has unobstructed antenna orientation, pointing upward or at the correct angle for your device type. Position the beacon away from metal surfaces, which block signals even in dry conditions and worsen in wet weather. Use high-visibility mounting brackets or bases that remain visible even when rain or fog reduces sight lines. Check that the beacon’s light, if equipped, functions properly in poor visibility. Regularly clean the beacon lens and antenna to prevent water droplets from interfering with signal transmission.
Is a magnetic roof mount secure enough for motorway driving?
Magnetic roof mounts are generally secure for motorway speeds when attached to a clean, flat metal surface on your vehicle’s roof. Before each journey, inspect the magnetic grip by attempting to move the beacon by hand; it should not shift. Ensure the mounting surface is free of dirt, rust, or protective coatings that reduce magnetic strength. For added security, use a cable tether in addition to the magnetic base, particularly if you frequently drive at high speeds or encounter rough road conditions. Test the mount at lower speeds first to confirm it holds before motorway travel.
What should I check before deploying an emergency beacon during a storm?
Before a storm, verify that your beacon is registered with the relevant emergency services and your GPS location data is current. Test the activation mechanism to ensure it functions smoothly. Check that the mounting is secure and the antenna has clear line of sight. Confirm the battery has sufficient charge and the device is waterproof or weather-sealed. Keep the beacon accessible from inside your vehicle so you can activate it quickly if you break down. Store backup batteries or know your device’s service life so you’re never caught without a working beacon during severe weather.