
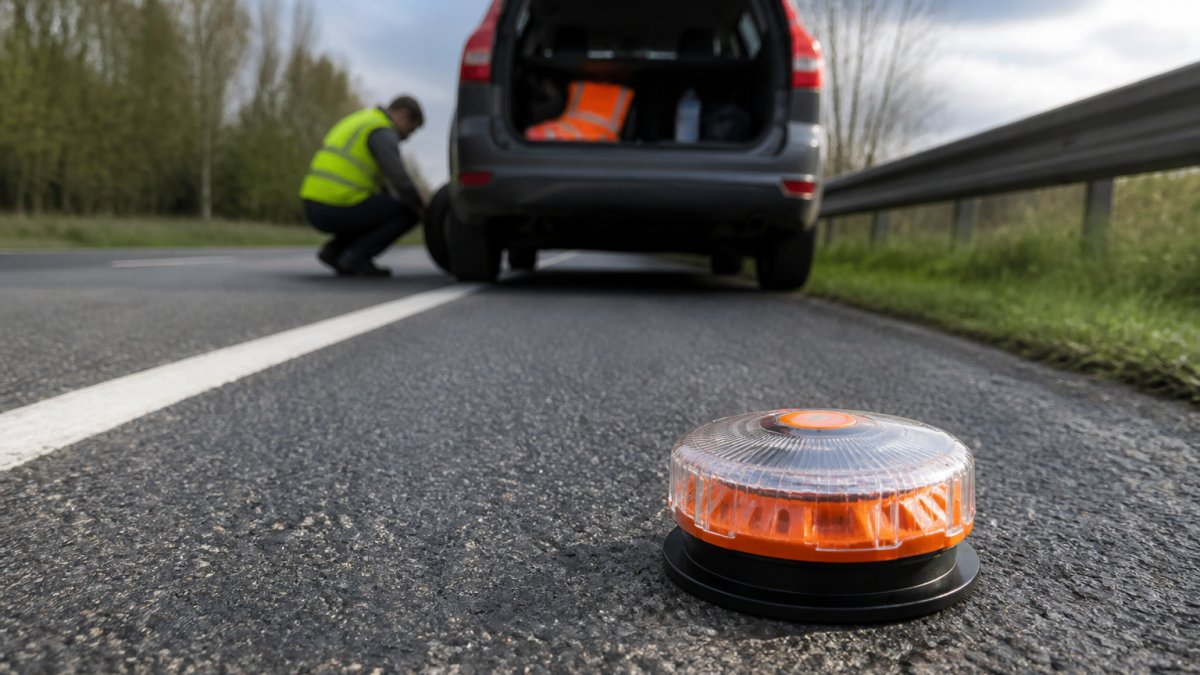
Battery Powered Hazard Lights for Emergency Roadside Repairs
Table of Contents
- Why Battery Powered Hazard Lights Matter During Roadside Breakdowns
- Best LED Road Flares for Breakdowns: What to Look For
- How to Use Magnetic Emergency Beacons Effectively
- Battery Life of Roadside Hazard Lights: Longevity and Performance
- Legal Compliance and Road Safety Regulations
- Maintenance and Testing Protocols for Reliable Performance
- Setting Up Your Emergency Kit: Step-by-Step
- Frequently Asked Questions
Last Updated: October 6, 2026
Why Battery Powered Hazard Lights Matter During Roadside Breakdowns
A stationary vehicle on a busy motorway faces genuine danger. Without proper warning, approaching drivers may not see your car until it’s too late. Battery powered hazard lights transform that risk profile entirely. They create 360-degree visibility that standard hazard lights alone cannot match, alerting traffic from much greater distances and in conditions where reflective triangles fail.
The real difference comes down to reaction time. A driver spotting your emergency beacon has seconds longer to slow down. In those seconds lies the margin between a near-miss and a collision. This is why emergency roadside repairs demand more than passive safety measures. Active warning systems, particularly LED beacons with high-intensity flashing patterns, have become essential equipment for anyone who spends time on motorways.
Vehicles equipped with battery powered hazard lights experience significantly fewer secondary collisions when visibility improves and approaching drivers get unmistakable warning that something requires their attention.
Battery powered hazard lights provide active warning that passive reflective triangles cannot match, dramatically improving visibility during roadside emergencies and reducing collision risk.
Best LED Road Flares for Breakdowns: What to Look For
When you’re choosing an LED road flare for emergency use, several features separate effective tools from decorative ones. The best LED road flares for breakdowns combine high-intensity output, reliable flash patterns, and durability that survives weather and impact.
Look first at light intensity. Measured in candlepower or lumens, this determines how far your warning travels. A genuinely visible beacon operates effectively at 100+ metres in daylight conditions. At night, that range extends further.
Magnetic mounting represents a practical advantage during actual breakdowns. You’re stressed, possibly injured, and working in traffic. A magnet that grips securely to your vehicle’s roof eliminates fumbling with brackets or suction cups. The beacon stays put regardless of wind or vibration.
Battery life determines whether your warning system works when you need it. Rechargeable options offer convenience between journeys, but cold weather performance degrades significantly. A backup battery-operated unit ensures functionality even after extended storage in winter conditions.
| Feature | What It Does | Why It Matters |
|---|---|---|
| High-intensity LED (100+ lumens) | Creates visible warning at 100+ metres | Approaching drivers see your vehicle sooner |
| Strobe/multi-mode flash | Alternating light patterns | Captures attention better than steady light |
| Magnetic base | Secure mounting without tools | Quick deployment during emergencies |
| USB rechargeable + battery backup | Flexibility between journeys | Reliability in all weather and storage conditions |
| Weatherproof housing | Survives rain, wind, temperature extremes | Functions reliably during actual breakdowns |
Durability matters because roadside emergencies happen in worst conditions. Your beacon must survive being placed hastily on wet tarmac, exposed to wind, and potentially struck by passing vehicles.
How to Use Magnetic Emergency Beacons Effectively
Placement Strategy for Maximum Visibility
Placement determines whether your emergency beacon actually prevents collisions. The goal is simple: position the light where approaching drivers will see it earliest and most clearly.
Your vehicle’s roof centre is the ideal location. This height and position ensures the beacon remains visible above other traffic, regardless of approaching vehicle size. A driver in a low sports car, an articulated lorry, or anything between will see your warning.
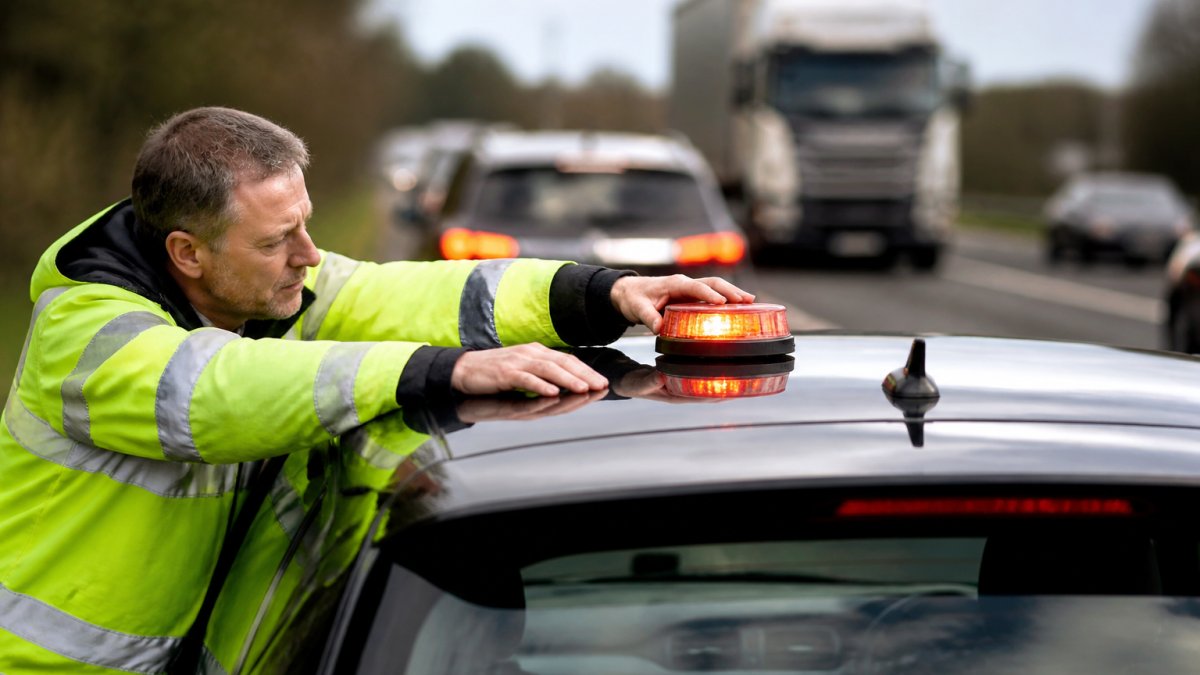
For dual placement, which provides additional safety margin, position one beacon on the roof and a second on the boot lid. This creates warning coverage from both directions and ensures visibility even if one beacon malfunctions. On motorways where traffic approaches from both directions, this redundancy saves lives.
Distance from your vehicle matters too. Place the beacon at least 30 metres behind your stationary vehicle, angled toward approaching traffic. This spacing gives drivers adequate warning distance to change lanes safely or reduce speed. Closer placement reduces reaction time and increases collision risk.
Never place a beacon directly in the traffic lane or where it could be struck by moving vehicles. Position it on the verge, well clear of the roadway. A beacon in active traffic becomes a hazard itself.
Activation and Flash Patterns
Activation must be immediate and intuitive. Your beacon should power on without requiring instructions or tools. A simple button press or automatic activation upon mounting ensures you deploy warning within seconds of stopping.
Flash patterns vary by design, and each serves specific purposes. A rapid strobe (4-8 flashes per second) creates maximum urgency and captures attention effectively. Slower patterns (1-2 flashes per second) remain visible but feel less emergent. Many quality beacons offer selectable modes, allowing you to choose strobe for serious breakdowns and steady or pulse modes for minor roadside stops.
Some advanced systems include vibration-activated modes that trigger flashing when the beacon detects impact or movement. This feature adds passive safety: if your vehicle is struck, the beacon automatically activates maximum warning mode without requiring manual intervention.
The choice between constant and intermittent flashing depends on your situation. Constant flashing draws attention fastest during initial deployment. Intermittent patterns extend battery life during extended breakdowns where you’re waiting for recovery services.
Battery Life of Roadside Hazard Lights: Longevity and Performance
Battery life determines whether your warning system functions during the actual emergency. This is where specification matters more than marketing claims.
A quality USB-rechargeable beacon typically operates 8-12 hours continuously on a full charge. This covers most roadside situations, even extended waits for recovery services rarely exceed this duration. However, this assumes room-temperature operation and standard flash modes. Real-world performance varies based on conditions and settings.
Cold Weather Performance and Runtime
Winter conditions dramatically reduce battery performance. Cold temperatures slow chemical reactions inside batteries, reducing available capacity by 20-40% compared to room temperature operation (pubmed.ncbi.nlm.nih.gov). A beacon rated for 10 hours at 20°C might deliver only 6-7 hours at 0°C or below.
This is why backup battery-operated systems matter. Traditional alkaline batteries tolerate cold better than rechargeable lithium cells, though performance still degrades. A beacon that accepts both rechargeable and disposable batteries provides genuine redundancy, you can deploy standard batteries if your rechargeable unit fails or depletes unexpectedly.
Test your beacon seasonally. If you rely on battery powered hazard lights for winter commuting, verify actual runtime during cold weather before you need it in an emergency. A beacon tested in summer might surprise you when deployed on a freezing motorway in January.
Store backup batteries separately from your beacon during winter. Cold reduces all battery capacity, but keeping spares indoors means they retain full charge when you need them. Swap them into your beacon only when deploying.
Legal Compliance and Road Safety Regulations
Your emergency beacon must meet specific standards to be legal roadside equipment. In the UK, hazard warning lights must comply with BS EN 12352 standards, which define light intensity, flash patterns, and reliability requirements. Roadflash products are certified to these standards, ensuring your beacon meets legal requirements for roadside use.
Some regions, particularly Spain and parts of Europe, enforce additional compliance. DGT 3.0 certification, for example, specifies exact performance parameters for emergency beacons used on Spanish roads. Roadflash manufactures DGT 3.0 compliant units specifically for drivers operating in these jurisdictions, eliminating compliance uncertainty.
Before purchasing any beacon, verify it meets standards applicable to where you drive. A beacon legal in the UK might not satisfy European requirements. Roadflash publishes compliance documentation with every product, removing guesswork from your purchasing decision.
Maintenance and Testing Protocols for Reliable Performance
A beacon that hasn’t been tested is a beacon you cannot trust during emergencies. Establish a simple maintenance routine.
Test your beacon monthly. Activate it in darkness to verify the flash pattern remains visible and consistent. Listen for any unusual sounds, crackling or intermittent operation indicates internal problems.
Clean the lens quarterly. Road grime, salt spray, and dust accumulate on the transparent housing, reducing light output. A soft cloth and mild soap restore clarity. Never use abrasive cleaners that scratch the lens, scratches scatter light and reduce visibility.
Charge rechargeable beacons regularly, even during seasons when you don’t drive frequently. Lithium batteries degrade if left completely discharged for extended periods. A monthly charge cycle, even if you don’t use the beacon, maintains battery health and ensures readiness.
Inspect the magnetic base annually. Check that the magnet still grips securely and the mounting surface shows no damage. A weakening magnet becomes a hazard during deployment, the beacon might shift or fall during braking or wind exposure.
Replace batteries in backup units annually, regardless of whether they’ve been used. Stored batteries lose charge over time, and you need fresh power available when you activate your emergency kit.
Setting Up Your Emergency Kit: Step-by-Step
What You’ll Need Before Your Journey
A complete roadside emergency kit combines multiple layers of protection. Start with your primary beacon, a battery powered hazard light with magnetic mounting. Add a backup beacon or traditional reflective triangle for redundancy. Include a high-visibility vest, a torch with spare batteries, and a phone charger.
Roadflash beacons are designed as the centrepiece of this kit. Their multi-award-winning design integrates GPS/Geolocation functionality on certain models, allowing emergency services to locate you precisely if you’re injured or disoriented. This feature transforms your beacon from a visibility tool into a genuine emergency locator.
Store your kit in an accessible location, the glove box, centre console, or boot. You need to retrieve it within seconds during a breakdown, not dig through a boot full of luggage. A dedicated emergency bag keeps everything organised and ready.
Common Mistakes to Avoid During a Breakdown
The first mistake is deploying your beacon too close to your vehicle. Many drivers place it directly behind the car or even in the traffic lane.
The second mistake is forgetting to activate your vehicle’s hazard lights. Your beacon supplements hazard lights; it doesn’t replace them. Both systems together create maximum warning. Hazard lights indicate a stationary vehicle; the beacon provides high-intensity, long-range visibility.
The third mistake is standing in traffic while waiting for recovery. Exit your vehicle only if you’re certain it’s safe. Stand on the verge, away from the roadway. Let your beacon do the warning work while you remain protected.
The fourth mistake is assuming your beacon is fully charged. If you haven’t tested it recently, you don’t know its actual state. A beacon that worked last month might be depleted now.
The fifth mistake is deploying only one beacon. Redundancy saves lives. A second beacon on the boot lid or a backup unit provides coverage if the primary fails.
Battery powered hazard lights represent the difference between being seen and being invisible during roadside emergencies. Your choice of beacon directly impacts safety, both yours and that of approaching drivers.
Frequently Asked Questions
How long do battery powered hazard lights typically last during an emergency?
Most battery powered hazard lights operate for 8-12 hours on a single charge or set of batteries, depending on flash mode and intensity. High-intensity LED models with USB rechargeable batteries often deliver longer runtime than single-use battery versions. Always check the manufacturer’s specifications and test your lights monthly to ensure they’re ready when needed. Cold weather reduces battery performance, so expect shorter runtimes in winter conditions.
Are magnetic emergency beacons legal to use on public roads?
Magnetic emergency beacons are legal on public roads in the UK when used during genuine breakdowns or emergencies. They must comply with visibility standards and should not be left unattended on the vehicle. Some products, like DGT 3.0 compliant emergency beacons, meet specific international safety standards. Always check local regulations before purchasing, and verify that your chosen beacon meets current road safety requirements for your region.
What’s the difference between a standard hazard light and a high-visibility LED beacon?
Standard vehicle hazard lights are built into your car and have limited visibility range, typically effective within 100 metres. High-visibility LED beacons produce 360-degree illumination with multi-mode flash patterns, visible from 300+ metres away, making them far more effective for alerting approaching traffic. Portable LED beacons also work if your vehicle’s electrical system fails, providing independent emergency warning that standard hazard lights cannot deliver during a complete breakdown.
How should I position hazard lights to maximise safety during a breakdown?
Place magnetic emergency beacons on the roof centre for 360-degree visibility, or use multiple units for added coverage. Position them at least 45 metres behind your vehicle on motorways and dual carriageways to give approaching drivers maximum warning distance. Activate beacons before exiting the vehicle and ensure they’re secured firmly. For additional safety, deploy a reflective triangle 45 metres behind your car as well, creating multiple visual hazard signals for oncoming traffic.